
Integrating Shopify with a HighLevel sub-account is simple and involves just two main steps. If you’d prefer a visual walkthrough, there’s a YouTube video below you can watch as well!
- Create a Custom App in Shopify
- Connect Shopify to Your Account
Steps to Integrate GoHighLevel with Shopify Store
[su_youtube url=”https://www.youtube.com/watch?v=Q_t70hFm6SY”]
Step 1: Create a Custom App in Your Shopify Store
Before integrating, you’ll need to create a custom app within your Shopify store. Here’s how:
- Log in to your Shopify store and select “Apps” from the dashboard.
- At the top of the screen, click “Develop apps”.
- If prompted, select “Allow custom app development” (skip to step 5 if already enabled).
- Confirm by clicking “Allow custom app development” on the next screen.
- Click on “Create an app”.
- Enter an app name (e.g., “Marvel’s App”) and select your email under App developer, then click “Create app”.
- Select “Configure Admin API scopes” to set up Admin API permissions.
- Under “Orders,” enable “read_orders” access.
- In the “Customers” section, enable “read_customers”.
- In the “Products” section, enable “read_products” access.
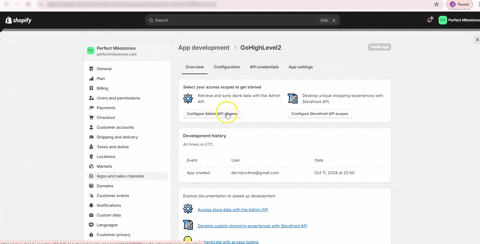
- Once these permissions are configured, save your app by selecting the “Save” button at the top right.
- After saving, click “Install app”.
- Confirm installation by selecting “Install” on the pop-up.
With the app now installed, you’re ready to integrate it with HighLevel!
- Locate the “Admin API access token” under the API credentials section.
- Click “Reveal token once” to access it, and copy it using the clipboard icon.
Step 2: Connect Shopify to Your HighLevel Account
With your custom app created, you can now connect Shopify to HighLevel.
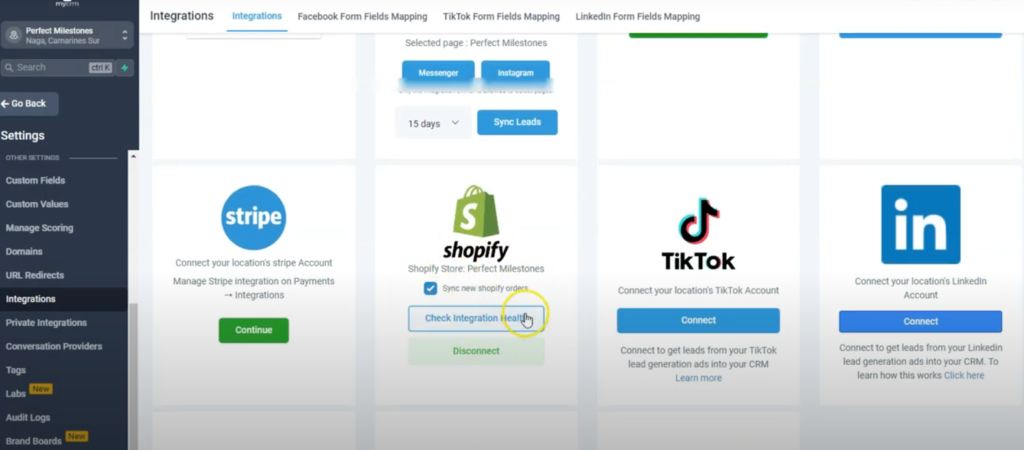
- Go to Settings > Integrations in your HighLevel account and click “Connect” under Shopify.
- Paste the Admin API access token you copied in Step 1, add the name of your Shopify store, and click “Connect”.
Your Shopify integration is now complete! 🎉